Showing posts with label Book. Show all posts

Tuesday, October 1, 2013

Yellow Butter Cupcakes


Theme: Butter & Buttermilk
Title: Yellow Butter Cupcakes
Inspirations: Rose's Heavenly Cakes


Ingredients:

2 large eggs, at room temperature
2/3 cup buttermilk, divided
1 1/2 tsp vanilla essence
2 cups cake flour, sifted into the cup and leveled off
1 cup minus 2 tbsp sugar
1/2 tsp baking powder
1/2 tsp baking soda
1/2 tsp salt
170g unsalted butter, at room temperature

Instructions:
  1. Center a rack in the oven and preheat to 160C(fan forced). Have ready 16-18 cupcake liners set in muffin pans.
  2. In a small bowl, whisk the eggs, 3 tbsp of the buttermilk and the vanilla until lightly combined.
  3. In a bowl of a stand mixer, mix the flour, sugar, baking powder, baking soda and salt on low speed for 30 seconds. Add the butter and the remaining buttermilk and mix on low speed until the flour mixture is moistened. Raise the speed to medium and beat for another 1 minute. Scrape down the sides of the bowl.
  4. Gradually add the egg mixture in two parts, beating on medium speed after each addition. Scrape down the sides of the bowl and fold using a silicone spatula until smooth.
  5. Scoop the batter using a small spoon into the cupcake liners until 3/4 full. Smooth the top using the back of a spoon.
  6. Bake for 15-20 minutes until a wire cake tested inserted into the center comes out clean.
  7. Cool cakes in the pan for 10 minutes. Remove from the pan and set them on a wire rack to cool completely


Sunday, September 22, 2013

Coconut Layer Cake with Swiss Meringue Frosting


I'm in the mood of making layer cakes. Lemon Mascarpone Layer Cake that I baked last week was excellent. There's always a reason why we need to chill certain kind of cakes before cutting and serve it. After an overnight chilling, the flavor of the lemon curd has intensely blended with the sponge cakes and it tasted great. I definitely will bake that again.

A few days ago, my girlfriends and I went to Ben's at BSC for lunch and we also ordered some desserts. One of them was Coconut Cakes and I thought of baking a coconut cake for the weekend. No....I'm not trying to replicate Ben's Coconut Cake, instead I'm doing my Williams Sonoma book's Coconut Layer Cake.


Coconut Cake

Ingredients:

2 1/4 cups cake flour
2 tsp baking powder
1/2 salt
3/4 cup unsalted butter, at room temperature
1 1/2 cups sugar
3 large eggs, separated, at room temperature
1 tsp vanilla essence
1 cup coconut extract /coconut milk
1 cup loosely packed sweetened coconut

Instructions:
  1. Preheat oven to 160C(fan forced). Grease two 9-inch cake pan and line with a parchment round.
  2. In a medium bowl, sift together flour, baking powder and salt. Set aside.
  3. In a bowl of a stand mixer or you can also use a handheld mixer, beat the butter and sugar until light in color and fluffy. Beat in the egg yolks and vanilla. Remove the bowl from the mixer. 
  4. Using a silicone spatula, gently fold in 1/3 of the flour mixture until almost incorporated. Fold in half of the coconut milk, and then fold in another third of the flour, followed by the other half of the coconut milk. Add the remaining flour and fold the ingredients until fully incorporated, and try not to overwork the batter or else the cake will be tough.
  5. In a clean mixing bowl of a stand mixer, whip the egg whites on medium-high speed until medium peaks form. Using a silicone spatula, fold in the egg whites into the batter, and then fold in the coconut.
  6. Divide the batter evenly between the pans. Bake for 25 minutes. Transfer the cakes to a wire rack and let cool in the pans for 3 minutes. Invert the pans onto the wire rack and lift of the pans. Peel of the parchment paper. Let cool completely.


Swiss Meringue Frosting

2 large egg whites, at room temperature
3/4 cup sugar
1 tbsp corn syrup
1/8 cream of tartar
2 tbsp water
Juice of 1/2 lemon
1/2 tsp vanilla essence
2 cups loosely packed sweetened coconut
Lemon Curd

Instructions:
  1. Set a saucepan filled with 1 inch water over a medium heat and bring to a simmer.
  2. Off the heat, combine egg, sugar, corn syrup, cream of tartar, water and lemon juice into a large heat resistant mixing bowl and whisk until blended. 
  3. Set the mixing bowl over the saucepan and whisk constantly while frequently scraping the edges until the mixture begin to thicken, about 10 minutes (an instant thermometer will register 75C). 
  4. Remove from heat, using a hand mixer or stand mixer fitted with whip attachment, beat the mixture at high speed until stiff and glossy, about 7 minutes. Using a silicone spatula, fold in the vanilla and half of the coconut.
Assemble the cake:
  1. Lay one cake layer cut side-up on a cake stand. Tuck in strips of baking paper under the cake edges to keep the plate clean.
  2. With a metal frosting spatula, evenly spread some lemon curd on top of the cake. Place a second cake layer on top of the curd.
  3. Using a frosting spatula, frost the sides and top of the cake with the frosting. Sprinkle the remaining coconut all over the cake.


Wednesday, August 14, 2013

Lemon Custard Cake


Today is 7 Syawal 1434H and I'm still on vacation :) . I'll be back in the office tomorrow so today I have my close families coming over for Raya Lunch. I made some fish curry, ayam masak merah, nasi putih, ulam kacang botor and some soup and ayam kicap for the kids. For dessert, I made some tiramisu in a cup, carrot cake (recipe follows in the next post) and my first attempt of Lemon Custard Cake. According to Williams Sonoma, it also called magic cake as it bakes, it will finally form one layer of lemon custard at the bottom and a light-textured lemon cake on top.

Ingredients:
1 cup milk
1/2 cup heavy cream
3 large eggs, separated
1 tbsp grated lemon zest
1/4 cup fresh lemon juice, strained
3 tbsp melted butter
1/4 tsp cream of tartar
1/2 cup white sugar
1/4 cup all purpose flour
1/8 tsp salt

Instructions:
  1. Position a rack in the middle of the oven and preheat to 180C.
  2. Have ready a 9 inch pie dish with 1 3/4 - 2 inches deep.
  3. In a medium bowl, whisk together milk, cream and yolks until blended, Whisk in the zest, lemon juice and melted butter. Set aside.
  4. In a large mixing bowl, combine egg whites and cream of tartar. Using a stand mixer fitted with a whisk attachment, beat until the egg white forms a soft peak, slowly add 1/4 cup sugar and continue beating until firm glossy peaks form.
  5. In a large bowl, stir together the flour, salt and the remaining 1/4 cup sugar. Whisk in the milk mixture until smooth. Using a silicone spatula, gently fold in half of the egg whites mixture until just combined. Add the remaining egg whites and fold in until fully incorporated. Pour into the pie dish.
  6. Bake until set about 30 minutes. Cool on wire rack.

Tuesday, March 19, 2013

Kitchentinker.com, a new beginning

Today marks a very important step in my blogging world.... I finally own a domain name. When I started blogging somewhere in 2009, I can't imagine that blogging can be this serious for me. I didn't really have any particular topic or theme to go with at the beginning. I just wanted to channel what I thought, what I like most, sharing the little knowledge that I gathered along the way, and most of all keeping in touch with my family and friends. Then, later I used this space as a place where I can share those tested and proven recipes, some are of course my children's favorite. At least, when they all have grown up and live by their own, they will have somewhere to refer to and can do on their own wherever they  are. Now, I am trying my best to update this blog at least once a week or twice if I have more time ( and more energy too).

This blog has never meant to be a food blog but somehow it has slowly become one as baking is the top of my list of the things that I do loved most.  I have been baking since I became a mother to my now 14 year old son. When it comes to baking, cake is my most favorite...cut out cookies are my least favorite. Anything in between, I'm always willing to try. During my early baking experience, I spent lots of time searching the recipes from the Net and tried them all. Some are ok, some are not...well, some people are sincere in sharing their recipes, and some are not. But, I did learn a lot...and I do sincerely share it.

In the early 2000s, I started purchasing cookbooks. My first, very well used and also have very much worn out cookbook is Nigella Lawson's How to Be a Domestic Goddess. Most of the recipes are very simple and very suitable for early and amateur bakers. I still have it and use it until now.


Jamie Oliver also writes good and simple cookbooks. I have his Jamie's Dinner, Jamie's Kitchen & Food Revolution among others. The Roasted Chicken & Onion gravy recipes were adapted from Jamie's Dinners.


For my children especially my son who has the interest (probably potential too) in food and cooking, I bought the basic baking books such as La Sur Table's The Art & Soul of Baking by Cindy Mushet and Williams Sonoma Baking Essentials.


For a very detail, step by step and more challenging baking experiment, I have Rose's Heavenly Cakes and The Bread Bible. It is very well narrated, very detailed processes and procedures, has a very good tips and tricks for bakers that really want to enhance their baking skills, further improved their knowledge and unleashed their potential.


Talking about cooking and baking utensils, make my head spinning! Can't get enough of them...err..who can? It is like a disease or a plague when it comes to this topic. I can't never manage my money when it comes to the cute little multi-color silicone spatula, or a heart shaped baking pan, or a very sleek souffle mould, or the red classy stoneware cake stand, well...the list goes on and on.. By the way, my husband bought me an icy-blue KitchenAid mixer somewhere in 2009...love the gift and the person who gave it :)

Till then...

Saturday, February 16, 2013

Devil's Food Cupcakes

The Day: Saturday
The Theme: ALL ABOUT CHOCOLATE
The Book: Williams-Sonoma Essentials of Baking
The Recipe: Devil's Food Cupcakes


The ingredients:
1 cup (125g) cake flour
1/3 cup (30g) cocoa powder
1/2 tsp baking soda
1/8 tsp salt
6 tbsp (90g) unsalted butter, at room temperature
1/2 cup (125g) caster sugar
1/2 cup (105g) firmly packed brown sugar
2 large eggs
1 tsp vanilla extract
2/3 cup (160ml) buttermilk
  
  1. Preheat oven to 175 degrees Celsius. Line 12 standard muffin-pan cups
  2. In a medium bowl sift together the flour, baking soda, salt, and cocoa powder. Set aside.
  3. In bowl of your electric mixer, or with a hand mixer, beat the butter and both sugar until light in color and fluffy (about 5 minutes).  Add the eggs one at a time, beat well after each addition. Scrape down the sides of the bowl. Add the vanilla extract and beat until combined. 
  4. Using a rubber or silicone spatula, fold in half of the flour mixture until almost fully incorporated. Add the buttermilk, followed by the remaining flour. Mix until well combined.
  5. Spoon the batter into the prepared muffin cups, filling each cup about three-fourths full.
  6. Bake until the cake tester inserted in the center for the cupcakes comes out clean, about 20 minutes.
  7. Cool completely on a wire rack  before applying any frosting. I used Whipped Cream Frosting.

Whipped Cream Frosting
1 cup whipping cream/heavy cream
2 tbsp icing sugar
1/2 tsp vanilla extract

Using a stand mixer: 
  1. In a large mixing bowl, combine the cream, sugar and vanilla. Put the whisk attachment and mixing bowl in the freezer for 5 minutes.
  2. Beat on medium-high speed until medium peaks form


Chocolate Crinkle Cookies

The Day: Saturday 
The Theme: ALL ABOUT CHOCOLATE
The Book: Williams-Sonoma Essentials of Baking
The Recipe: Chocolate Crinkle Cookies


Ingredients:
125g unsweetened chocolate, chopped (didn't have them, so i used bittersweet Manjari 64%)
1/4 cup (60g) unsalted butter
1.5 cups (235g) all purpose flour (I used cookie flour)
1/2 cup (45g) cocoa powder
2 tsp baking powder
1/4 tsp salt
4 large eggs
2 cups caster sugar
1 tsp vanilla extract
1.5 cups (280g) miniature semi sweet chocolate chips
1/2 cup (60g) icing sugar (sifted), more if needed

  1. Put the chocolate  & butter in a microwavable glass bowl and heat it for 15 seconds, stir with silicone spatula, heat it again for 15 seconds and stir, repeat the process until the chocolate & butter fully melted and well blended. Put aside to cool. You can also use a double boiler method as per suggested by the book.
  2. In a medium bowl sift together the flour, baking powder, salt, and cocoa powder. Set aside.
  3. In a large mixing bowl, combine the eggs, sugar and vanilla. Beat on medium speed until light in color and thick, about 3 minutes. Beat in the chocolate mixture on low speed until blended. Add the dry ingredients and beat until incorporated. Fold in the chocolate chips.
  4. Cover the bowl with plastic wrap and refrigerate until firm enough to roll into balls, about 2-3 hours
  5. Preheat oven to 165 degree Celsius. Line 2 baking sheets with parchment paper
  6. Roll a rounded tablespoon of dough between your palms into a 4 cm ball, roll it in the icing sugar. Place the them 3 cm apart on the prepared baking sheets
  7. Bake it for 15 minutes. Let cool in the baking sheet for 5 minutes before transferring the cookies to a wire rack to cool completely
  8. Store in an airtight container  
 

Tuesday, February 12, 2013

Dairy Challah


I have been meaning to make Challah for quite some time...ok...ok..when I said some time, it means a few years :). Like the croissant in the previous posting, I did some research on it, reading from a number of books, multiple websites, youtube-ing etc. So today, I finally baked Challah...a dairy one. Traditionally, the classic Challah is made with water instead of milk and oil instead of butter. For those who loves bread pudding, Challah is great to be used in making it.

Ingredients:

3/4 cup milk
2 tbsp honey
1 1/8 tsp instant yeast
2 large eggs, at room temperature
3 tbsp butter, softened
2 1/2 bread flour, plus more if needed
1/2 tsp salt
1 egg, lightly beaten


Method:

  1. Place milk, honey, 2 eggs, butter, salt, flour and yeast in the pan of the bread machine in the order recommended by the manufacturer. Set for Dough/Knead and press Start.
  2. When cycle finishes, turn dough out onto a lightly floured surface and lightly knead, add more flour if needed. Divide dough into 3 equal pieces. With flattened hand, roll each piece back and forth, forming a 15 inch rope with tapered ends.
  3. Line a baking sheet with parchment paper or a silicone mat and lay the 3 ropes on the sheet with the ends facing you. Pinch together the three ends furthest from you and braid the ropes together. Tuck the ends under just slightly.
  4. Cover the braid loosely with oiled plastic wrap or clean kitchen towel and put in a warm place, let rise 40-50 minutes. Meanwhile, preheat oven to 180 degrees C a few minutes before baking.
  5. Glaze the braid with beaten egg and bake in the preheated oven for about 20-25 minutes until golden.
  6. Cool completely on a wire rack before slicing it with serrated knife


Sunday, January 27, 2013

Brown Butter Blondies


I felt like indulging into some kind of Julie & Julia project, but the only thing different is that I'm using Williams-Sonoma's Essentials of Baking recipes. They are actually very basic and typical continental recipes but well I must say I'm having fun challenging myself to do it. So today another recipe from its Cookies, Bars and Brownies section, it called Brown Butter Blondies. Blondies are similar to brownies minus the chocolate. What in the world is Brown Butter? Just go to Cold Storage and ask for a brown butter....nope!...stop there!  Well, it made from clarified butter.

Clarified butter process:
  • Melt a 250g unsalted butter in a small glass pan (or frying pan) over a low heat until it is foamy on the surface
  • Remove the pan from heat, let is rest for a couple of minutes. It will form 3 layers, which is the foam on the surface, yellow liquid in the middle and milk solid in the bottom.
  • Using a tablespoon, remove the foam from the surface. Pour the yellow liquid into a clean bowl very carefully and leave the milk solids behind in the pan. Discard the milk solid.

Brown Butter:
  • Heat clarified butter in a small glass bowl (or frying pan) over low heat until light brown about 6-7 minutes. Remove from heat. It will look like this...
  • 250g butter will yield the required amount of the clarified butter in this recipe


Ok...let us meet and get to know these blondies better, shall we?


Ingredients:
1 1/2 cups self raising flour
1/2 tsp salt
2/3 cup clarified unsalted butter
1 cup firmly packed light brown sugar
1/2 cup caster sugar
2 large eggs
2 tsp vanilla extract
1 tsp lemon juice

  1. Preheat oven 160 degrees Celsius. Line an 8 inch baking tray with baking paper
  2. In a medium bowl, sift the flour and salt. Set aside
  3. In a small glass pan, heat the clarified butter until light brown for about 6 minutes. Remove from heat and cool slightly
  4. In a large mixing bowl, combine both sugars and slightly cooled brown butter and stir using a silicone spatula until well blended. Mix in the eggs, vanilla and lemon juice until smooth. Stir in the flour mixture and mix until just combined. Pour the mixture into the prepared pan. 
  5. Bake for 30-40 minutes or until the cake tester inserted into the center comes out clean
  6. Transfer to a wire rack and let it cool for about 1 hour
  7. Serve with ice cream and chocolate sauce


Saturday, January 26, 2013

Maple Walnut Squares

This recipe was supposed to be Maple Pecan Squares, I was too lazy to go to the bakery supplies store to get the pecan yesterday, so just tried to find it at Carrefour & Cold Storage nearby my house but it was not available. I got like nicely 2 cups of walnuts in the fridge and decided to substitute it with what I have. This is quite an expensive recipe...the walnut, the pure canadian maple syrup, and to make it more expensive I substitute the brown sugar with muscovado sugar. Muscovado sugar is unrefined sugar and nutritionally richer that the brown sugar because it retains most of the natural mineral from the sugar cane, and the taste is more intense .... in Malaysia it close to the dark brown gula melaka.


Ingredients:

Crust
1 1/4 (200g) cup all purpose flour
1/3 (75g) firmly packed brown sugar
1/4 tsp salt
1/2 (125g) cup cold unsalted butter, chopped

Filling
6 tbsp (90 g) butter
1/3 cup (105 g) pure maple syrup
2/3 (155 g) firmly packed brown sugar
1/3 cup (80 ml) heavy /double cream
2 cups (250 g) coarsely chopped pecans

  1. Preheat the oven to 180 degree Celsius and line a 9 inch square baking pan with heavy duty aluminum foil. Let the foil extend up the sides of the pan. Spray the foil with vegetable oil.
  2. In large mixing bowl, combine flour, sugar and salt, stir until blended. Fold in the butter and mix until it resembles fine breadcrumbs.
  3. Press the crumb mixture into the bottom of the prepared pan. Bake the crust for 12-17 minutes until edges are lightly browned.
  4. In a saucepan over medium heat, combine and stir together the butter, maple syrup and sugar until the butter melts and sugar dissolves.
  5. Bring to a boil and continue to let it boil for 1 minutes.
  6. Remove from the heat and stir in the cream. Fold in the nuts and pour the filling over the crust. Spread evenly.
  7. Bake for 25 minutes or until the filling is set when you give the pan a gentle shake.
  8. Let cool completely for about 1 1/2 hours before lifting up the liner from the baking pan.
  9. Cut it into 25 small or 16 medium squares.


Sunday, January 6, 2013

OLLO 2013!

source: Mr Google

OLLO! Happy New Year everybody! It has been quite a while not doing any recipes from Rose's Heavenly book. So today I am baking a Marble Velvet Cake page 52 of the abovementioned book (picture below, the lady in red). It is not just another marble cake, it is a sour cream based and it uses egg yolks only...6 of them! But of course obviously, Western desserts are just too sweet for me so I did a little bit modification on the sugar.


Marble Velvet Cake

Batter:
85 gm (3 oz) dark chocolate, chopped (I used Valrhona Manjari 64%)
112 gm (4 oz) egg yolks, about 6 of them
1 cup sour cream ( I don't have it so I used 1 cup of buttermilk instead)
2 tsp vanilla essence
3 cups sifted cake flour
1 1/4 cup caster sugar
1 tsp baking powder
3/4 tsp baking soda
1/2 tsp salt
255 gm unsalted butter, room temperature

Let's bake it:
  1. Grease one 10-cup metal fluted tube pan and sift some flour over it
  2. Preheat oven to 160 degrees Celsius
  3. Put the chocolate in a microwavable glass bowl and heat it for 15 seconds, stir with silicone spatula, heat it again for 15 seconds and stir, repeat the process until the chocolate fully melted. Put aside to cool. You can also use a double boiler method.
  4. In a medium bowl, whisk the yolks, 1/4 cup of the sour cream and vanilla until just combined.
  5. In the bowl of a stand mixer, mix the flour, sugar, baking powder, soda and salt on low speed for 30 seconds. Add the butter and the remaining sour cream, mix until all the dry ingredients are moistened. Scrape the sides and beat for another 1 1/2 minutes.
  6. Gradually add the egg mixture in 3 parts, beating on medium speed every 20 secs after each addition.
  7. Scoop out about 1 1/2 cups of the plain batter into a medium bowl and stir in the melted chocolate, mix well until the color fully incorporated.
  8. Scoop 1/3 of the plain batter into the prepared pan. Top with half of the chocolate mixture. Spread gently but evenly. Top another third of the plain batter followed by the remaining chocolate mixture. Finally, top with the remaining plain batter, spread evenly.
  9. Dip a tablespoon into the batter,without touching the sides or bottom, lift up and over in a folding motion, like the roll of a wave, 6-8 times, going all around the pan. Smooth the surface evenly.
  10. Bake for 50 minutes or until a wire tester inserted into the cake comes out clean.
  11. Let the cake cool in the pan for 10 minutes before invert it onto a wire rack. Cool completely


Tuesday, December 25, 2012

Triple Chocolate Cookies


Another batch of chocolate chip cookies this weekend...it's like a must to bake cookies every weekend just because the 2 year old has already stopped taking milk formula for the past one month, so his eating habit is like MASSIVE! Have to deal with his sugar overdosed as well...very hyper! This recipe was adapted from Triple Chocolate Chip Cookies from Williams-Sonoma book entitled  Essentials of Baking.

Ingredients:
2 1/2 cups all purpose flour or cookie flour
2 tsp baking soda
1 tsp salt
1 cup unsalted butter, at room temperature
3/4 cup firmly packed brown sugar
1/2 cup white sugar
2 eggs
2 tsp vanilla essence
1 cup semisweet chocolate chips
1 cup chopped milk chocolate
1/2 cup chopped bittersweet chocolate

 Let's bake'em!:
  1. Preheat oven to 175 degree Celsius
  2. Line baking tray with grease paper or silicone mat
  3. Whisk the flour, salt and soda in one big mixing bowl, you can also sift it if you want instead of whisking it.
  4. Using electric mixer, cream butter and both sugars until white and creamy. Add eggs one by one and mix just until combined. Pour the vanilla extract.
  5. Fold in the flour mixture with the mixer running at low speed. 
  6. Fold in the chips & both chocolate using a spatula.
  7. Spoon the batter onto the baking tray, an inch apart from each other. I used an ice cream scoop to get an even size.
  8. Bake for 10-12 minutes, turning the tray after 3/4 baking time.
  9. Let the cookies cool on baking sheet for 5 minutes then transfer them to wire rack to cool completely.

Sunday, December 16, 2012

Soft & Chewy Chocolate Chip Cookies


Soft & Chewy Chocolate Chip Cookies
(from Martha Stewart Living)

Ingredients
2 1/2 cups all purpose flour or cookie flour
1/2 tsp baking soda
1 cup unsalted butter
1/2 cup caster sugar
1 cup firmly packed light brown sugar
2 eggs
2 tsp vanilla extract
1/2 tsp salt
1 cup chocolate chips
1 cup chopped milk chocolate
(But you can also use 2 cups of chocolate chips)

Method:
  1. Preheat oven to 180 degree Celsius
  2. Line baking tray with grease paper or silicone mat
  3. Whisk the flour, salt and soda in one big mixing bowl, you can also sift it if you want instead of whisking it.
  4. Using electric mixer, cream butter and both sugars until white and creamy. Add eggs one by one and mix just until combined. Pour the vanilla extract.
  5. Fold in the flour mixture with the mixer running at low speed. 
  6. Fold in the chip & chocolate using a spatula.
  7. Spoon the batter onto the baking tray, an inch apart from each other. I used an ice cream scoop to get an even size.
  8. Bake for 8-10 minutes, turning the tray after 3/4 baking time.
 Cookie treat after making Baked Pasta, look at those sweat which probably blended well with the pasta! That's why your sisters & brother love you so much :)

Saturday, November 24, 2012

Roasted Chicken with Onion Gravy

How about cutting off some fat? No cake or dessert this weekend ok...let's indulge into poultry and roast some birds..


Roasted Chicken

Ingredients:
1 medium chicken
Salt & coarse black pepper
1 whole bulb of garlic
1/4 tsp cumin seeds (jintan putih)
1/4 tsp fennel seeds (jintan manis)
1 tsp coriander seeds (biji ketumbar)
4-5 big sized washed potatoes - each cut into 8 equal sizes
1 lemon
a handful of fresh thyme & rosemary
olive oil
Let's roast the bird!:
  1. Using a pestle and mortar, pound half of the garlic bulb with the seeds until it becomes a paste. Generously rub the chicken with the paste and a lot of salt and pepper. Put it in a big container, cover and leave it in the fridge for about 4-6 hours. I normally marinate it overnight because the meat will become really tasty.
  2. When you're ready to cook, preheat the oven to 190 degrees Celsius.
  3. Bring a large pan of salted water to a boiling point,  put the potatoes together with the whole lemon and the other half of the garlic bulb into it and cook for 12 minutes.
  4. Drain and allow to steam dry for 1 minutes, take out the lemon & garlic and put aside. Toss the potatoes back in the pan while they are still hot. Put aside.
  5. Stab the hot lemon for about 10 times. Take the chicken from the fridge, pat dry with kitchen tower and rub it all over with olive oil. Push the lemon, hot garlic cloves and thyme into the cavity. Put the chicken into a roasting tray, cover with aluminum foil and bake for 45 minutes.
  6. Take off the foil and remove the chicken into a plate, toss the potatoes into the roasting tray together with the rosemary leave and shake the tray around. Push all the potatoes to the sides of the tray and put back the chicken in the center. Bake for another 40 minutes.
  7. Remove the lemon and garlic from inside the chicken and it is ready to serve with onion gravy.

Onion Gravy 

Ingredients:
4 medium yellow onion, peeled and finely sliced
olive oil
5 tbsp balsamic vinegar
2 tbsp of butter
3 cups of chicken or beef stock - or just use 2 chicken stock cubes with 3 cups of water
2 tbsp cornflour

  1. Fry the onion in a little oil under a really low heat, covered, for about 15 minutes until soft and translucent.
  2. Remove the lid, turn the heat up and once the onions become golden brown, pour in the vinegar, stir and let it boil. 
  3. Turn the heat down and put in the butter, pour the stock and stir. Let it simmer. Turn off the heat and sift the liquid into a bowl and discard the onion. 
  4. Put back the liquid into the pan and let it boil. Add the cornflour and stir until you reach your preferred consistency.

adapted from JO's Jamie's Dinners book - modified to suit my taste


Thursday, November 22, 2012

Scone / Strawberry Jam Shortcake


Hujan kek luar potang-potang ni, ghaso lapar la dek eh. Apo kato kito buek skon...penamo eh skon tu? Dah tontu-tontu bukan kuih Nismilan. Kuih ongputih ni...Scone kalau kek England ataupun kalau kek Amerika namo eh shortcake, selalu eh dilapih dengan strawberi jadi dinamokan Strawberry Shortcake. Moh kito tinjau resepi kuih ongputih ni. Mandangan kuih ni kuih ongputih, resepi eden tulih bahaso inglish la yo.

Ingredients:
2 cups of all purpose flour
1/4 tsp salt
1 tbsp baking powder
3 tbsp castor sugar
1/2 cup unsalted butter - frozen
1/2 cup cream (can substitute with milk if not available)
1 egg
egg white

Let's do it:
  1. Preheat oven 200 degree Celsius. Line your baking tray with parchment paper
  2. Whisk flour, salt, baking powder and castor sugar in a big mixing bowl. 
  3. Grate the butter into the flour mixture and mix with your fingertips until it became crumbly.
  4. In a small bowl, lightly whisk the egg and cream.  Add to the flour mixture just until it combined and became a soft dough.
  5. Transfer the dough into a lightly floured surface, gently knead and roll it into a 1/4 inch thick dough. Dip a scone cutter into flour and stamp the dough into 8-10 scones depending on the size of the cutter.
  6. Place the scones into the baking tray 1 inch apart, brush the top with egg white and sprinkle some granulated sugar if you like. Bake them in the oven for 10-12 minutes.
  7. Serve it with a homemade strawberry jam and some leftover creamcheese frosting from my earlier posted  carrot cake.
Adapted from: Nigella's Domestic Goddess

Sunday, November 18, 2012

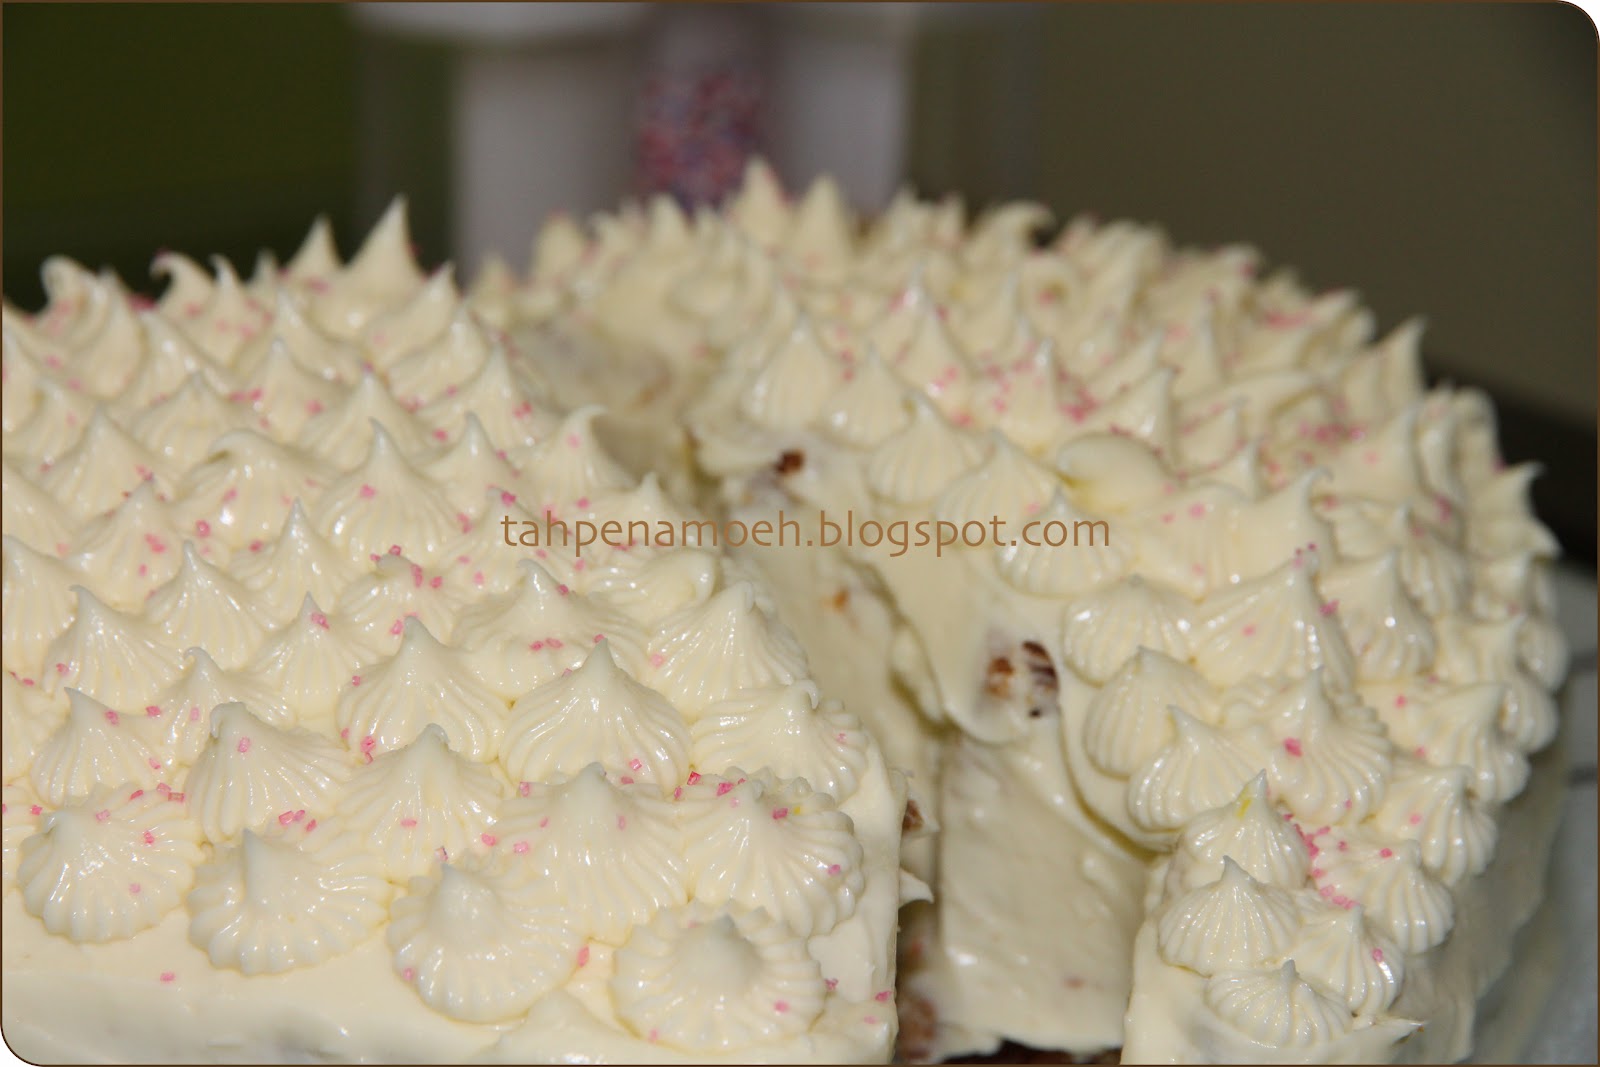
Heartbreak Carrot Cake with Cream Cheese Frosting


Today, my little baby Iman is having his 2nd birthday, no celebration sebab 2 tahun bukan tau apa benda punnnn. Lagipun abang dengan kakak takde kat rumah, bercuti di kampung nenek. Tapi Mummy buat la jugak satu kek which supposed to be a HEARTY cake...hehe. It is a carrot cake bake in a heart shape baking tin. Disebabkan Mummy dok layan FB tengok handbag & jam, lupa nak check temperature & time lepas masukkan cake dalam oven. Ingat nak check after 30 minutes...last-last 47 minutes...tengok-tengok dah dry, overbake. So tukar nama jadi HEARTBREAK CARROT CAKE la...
 

Anyway, Iman memang tak suka makan kek. So kakak Maryam sajalah makan ye. Sebelum makan boleh letaklah gold sprinkle ke, glitter dust ke chocolate rice ke...kannn.

Ingredients:
2 cups of grated carrot
1/2 cup sultanas or raisins
1/2 cup chopped walnuts
1 cup castor sugar
3 eggs, lightly beaten
3/4 cup vegetable oil
2 cups self raising flour
2 tsp mixed spice
1 tsp ground ginger - optional (I didn't put because I don't like it)
1 tsp ground cinnamon
1 tsp soda bicarbonate

Let's bake:
  1. Preheat oven to 180 degree Celcius ( 160 if using fan forced oven). Grease and line base of a deep 20cm square cake tin with baking paper.
  2. In a medium bowl, sift together flour, soda & spices.
  3. In a big mixing bowl, put carrot, sultanas, walnuts and sugar. Add eggs and oil. Mix with wooden spoon or silicone spatula.
  4. Add the flour mixture. Mixed until combine and no patches of flour visible.
  5. Pour into the prepared tin, smooth surface
  6. Bake for 40 - 50 minutes or until skewer comes out clean when inserted into the center
  7. Leave cake in tin for 10 minutes before turning onto wire rack. Cool completely.

You can either serve and eat it like that or you can make some cream cheese frosting to go with.

Cream cheese frosting

500gm cream cheese
3/4 cup icing sugar
Juice and zest of one leman

Using a hand electric mixer, beat all of the ingredients until creamy. Spread on the cooled cake.


Sunday, November 11, 2012

Soft Oatmeal Cookies

Ini resipi ulangan, since the kids will be at home enjoying their school holidays that started yesterday so need to prepare some snack for them. So this one is like compulsory menu during holidays.


Ingredients:
8 oz - 1 cup - 227gm unsalted butter (softened)
6 oz - 3/4 cup light brown sugar
4 oz - 1/2 cup caster sugar
2 large eggs, room temperature
2 tsp vanilla extract
2 cups cookie flour
1/2 tsp baking soda
1/2 tsp baking powder
1/2 tsp salt
1 1/2 cups rolled oats
1 1/2 cups choc chips or you can also substitute with the same amount of raisins or dried cherries

Let's bake them:
  1. Preheat oven 175 Cel (350 F). Line baking sheets with parchment paper or silicone mat
  2. Cream butter, brown and caster sugar in the bowl of a stand mixer for 2 minutes. Scrape down and side of the bowl with spatula. Add eggs and vanilla at once and blend well
  3. In a medium bowl, whisk flour, baking powder, soda and salt. Add to butter mixture all at once. Blend slowly until no more patches of flour. Scrape down the bowl.
  4. Using a spatula, add oat and choc chip and blend well.
  5. Scoop a tablespoon of batter onto the baking sheets, 2 inches apart. 
  6. Bake for 13-16 min, rotating them in between, until the cookies are golden brown at the edges and still a bit pale in the center.
This batch makes about 30 pieces of medium cookies.
Source: Adapted from The Art & Soul of Baking by Cindy Mushet


Print